Yesterday I wrote about a different way to write a WordPress post. Today, I am going to explain what (and how) I did it!
Using MS Word (version 2010 on a Windows computer – I think Word 2007 also has this capability), you can now write a blog post and then automatically upload the final post directly to your blog!
The good news about this is that prior to learning about this, I had to write my posts like I always did. My preference was to fire-up my Dashboard and write it all online. This has the peril of losing all my work if I lost the connection, or, I simply would save early and often. The problem with frequent saving is that multiple revisions get saved, which in turn, takes up extra database storage (granted it is not much, but it is extra an unnecessary).
Well, I discovered that Word 2010 (again, the PC version, not on the Mac – boo!), you can link MS Word directly to your blog and create a new post!
Why would you want to write a blog post in MS Word?
I admit, I am not a HUGE MS fan, however, my word processor of choice is, MS Word. I am familiar with it, and I use it every day. I am ‘fluent’ in a lot of the capabilities it has and I can produce a document quickly.
Another nice benefit is that Word provides you with some nice Clip Art (and photos) that you can use royalty free! There is an entire library of images that you have at your disposal – something that bloggers are always looking to use!
Those 2 things are reason enough to start using MS Word as my editor for blogging!
Here is what you need to do (again, this is only available MS Word 2010 (maybe MS Word 2007), so make sure you are up to date with that version):
-
The first step is to ensure that your blog is ready to accept a remote publish method. This is only needed to be done once. This is also (or was) required if you ever publish via your smartphone. To enable your blog for remote publishing, log into your Dashboard and navigate to Settings > Writing > Remote Publishing and check the XML-RPC and click “Save Changes.”

-
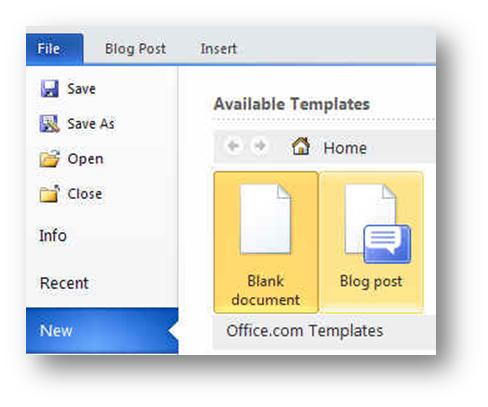
Launch MS Word and go to File / New / Blog Post (have you noticed that this option was there before?) and then click on the Create Button.
-
Each blog post needs to ultimately end up on a blog! So, one of the first things that Word asks for is a blog name and log in credentials. You will be presented with a pop-up window that looks like this:
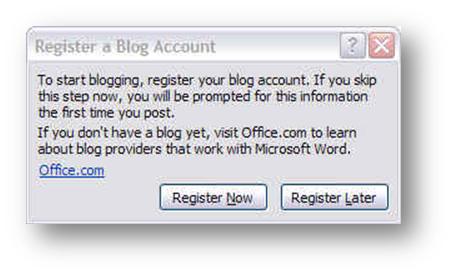 Click on the Register Now button.
 - The next window that pops up will be the following:
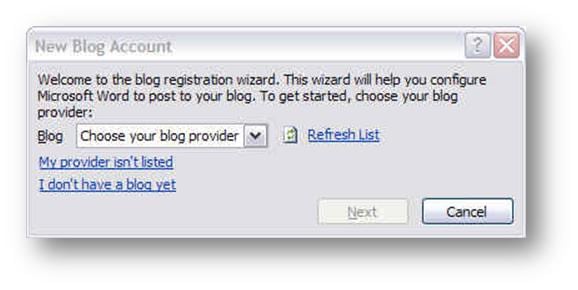
In the Blog dropdown, select the option WordPress and click on the Next button. -
Step 3 told MS Word what kind of blog it is, now you need to let MS Word know WHERE the blog is and how to log in.
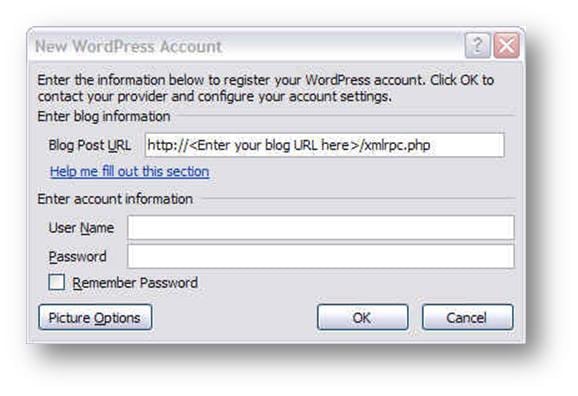
In the area for Blog Post URL, enter YOUR blog address and replace the text <Enter your blog URL here> with your blog address. For me, I had the full link say, https://digitalmaestro.com/xmlrpc.php. If you have your blog in a subdirectory like, “/blog” make sure you include that in the URL (as if it was https://digitalmaestro.com/blog/xmlrpc.php.
Next, add your User Name and Password that are used to log into your blog and click the OK button. When you do that, you will see the warning:

You can take this warning at face value. If you think someone may be tracking your internet connection, say, No, and stop this process now. You will not be able to use MS Word to write your post and immediately upload it directly. If you say, Yes, you can continue and you acknowledge the risk. If you are on a private network at home (as opposed to sitting in your favorite coffee shop with free WiFi), I feel safer doing this. You can decide your level of concern.
-
Since you are still reading, I assume you clicked on Yes. The last message you will see is your confirmation message that reads:

Click on the OK button. You are now all registered and ready to go!
-
Now it is time to do what you do best… Write your post, insert your images, your clip art, your Charts, your screen shots, etc.
-
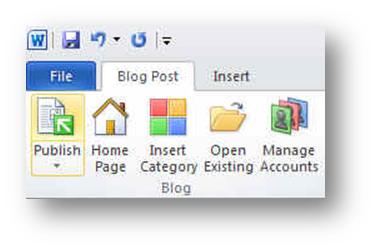
When you are ready to publish to your blog, simply click on the Publish Toolbar:
-
There you go! You are all done and your content has been published to your blog!
-
Want to see the fruits of your labors? Click on the Home Page toolbar and you will have your home page of your site opened up for you!
-
If you want to add an existing Category to your post? Click on the Insert Category icon and the categories on your blog will become available for selection!
With all of this cool publishing stuff, there are some disadvantages, but I feel the advantages outweigh the disadvantages. This is only my second post straight from MS Word – I will continue using it and getting more experience. Look for an upcoming post with my results and feelings!
In the meantime, leave a comment if you have ever used this, or will plan on using it! Thanks.

 Click on the Register Now button.


Paul thanks for this cool info? I never knew about this. Can’t wait to try it out.
Glad I could help! I thought it was pretty neat!
Do you know if there any way this would also work to publish an ezine on 1 shopping Cart? I find it very difficult to line up pictures etc. properly in 1 Shopping Cart.
Great article, thank you.
Hi Cindy – Thanks for the question.
I am not sure what you are trying to do – my understanding is that 1ShoppingCart is primarily for eCommerce and selling.
Are you referring to the list building feature it provides similar to AWeber or Constant Contact? If so, I am not aware of any way to use MS Word to automatically feed some sort of broadcast message directly to 1ShoppingCart.
MS Word is useful if you want to create charts and publish them to WordPress remotely. Another option is to install the TinyMce plugin which enables all the hidden features already included in your WordPress editor.
Thanks, Brad!
Great points about using Word for the graphics that it provides. *That* is what i was trying to get across as one of the reasons to use post from the application.
I have played around with TinyMce a bit in the past, as well as Dean’s FCKEditor. I agree that TinyMce is mucg better than Dean’s!
Thanks for stopping by and leaving a comment!
Hello there! Do you know if they make any plugins to help with
Search Engine Optimization? I’m trying to get my blog to rank for some targeted keywords but I’m not seeing very good results.
If you know of any please share. Appreciate it!
Before looking at plugins, have you seen this post? SEO For WordPress: A Short Tutorial